vintage may guest: running with scissors

kicking off week two of guest posts for vintage may is a good friend, jess of running with scissors!  i knew of jess’ blog before we competed together in project run & play (due to her awesome dino tails, which took blogland by storm a while back) but i became a big fan of hers during our season, where she sewed some really amazing garments – check out this suit!  jess’ designs are often heavily influenced by history and she is especially great at designing for boys, so i asked if she would do a boy look for vintage may.

jess came up with this fantastic modern take on lederhosen and a tutorial for you to make your own!  as a gal with german heritage, these make me especially excited.  check it out!

runningwithscissors

hoser
I’m excited to be here participating in Vintage May!  I love looking to vintage or even historical clothing for inspiration, and trying to take the old fashioned styles and make them modern.  It’s a challenge for me to design clothing with the influence of the vintage piece, but make something that doesn’t look like a historical costume.  I also love to sew for boys! So how I was inspired to make modern lederhosen. My neighbor is German and immigrated to the United States as a child, and was showing me a pair of heirloom leather lederhosen her brothers and sons wore.  They were so cool, over fifty years old, and had metal exposed zippers for the side front closure. So I pinned quite a few lederhosen for inspiration and got thinking of ways to take a traditional Bavarian short design and make it modern and hopefully cool.
leder
This top photo in the collage is my favorite, specifically the boy on the far right. {top}, {left}, {right}
hoser6
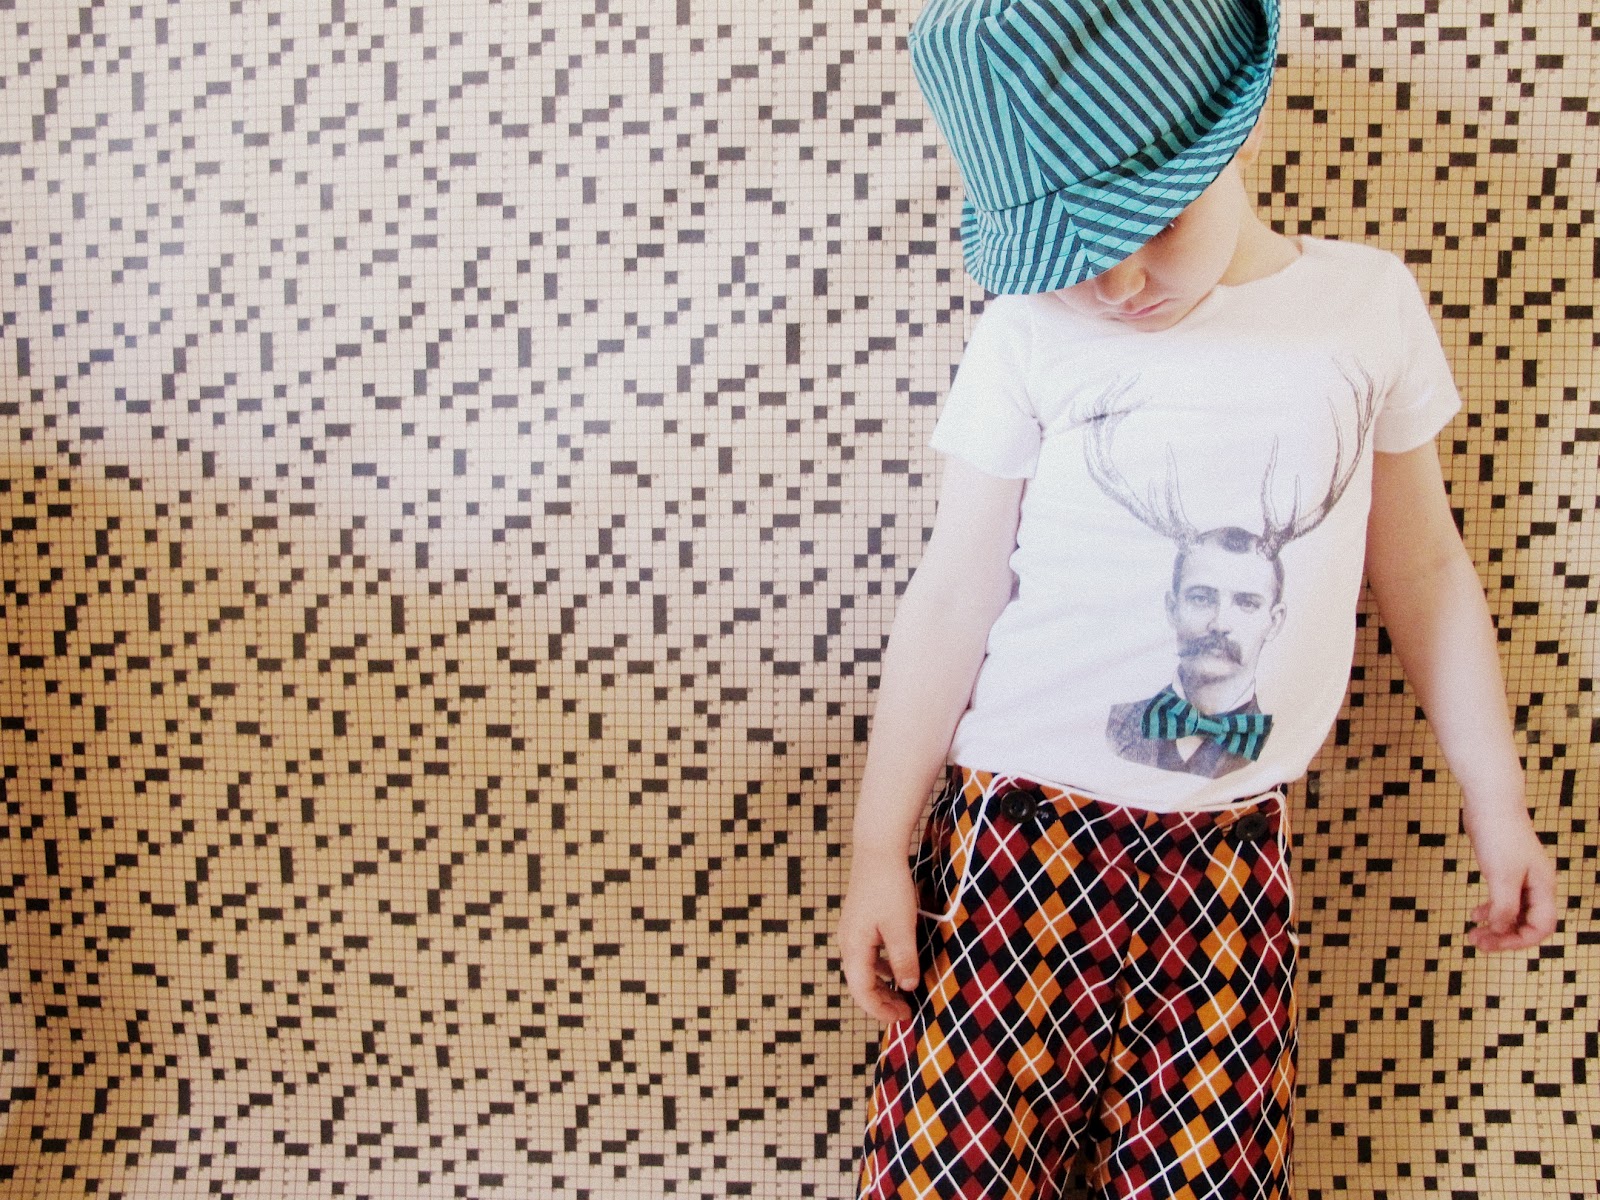
So I designed a pair of knee length shorts with the double exposed zipper front, slant pockets, and a side flap-patch pocket.
hoser8
The front of the shorts unzip into a front panel.  To secure the front panel to the rest of the shorts, Velcro attaches at the waistband.  I thought Velcro would be easier for little guys to get them on and off rather than two snaps, buttons, or hook/eyes.
IMG_1853
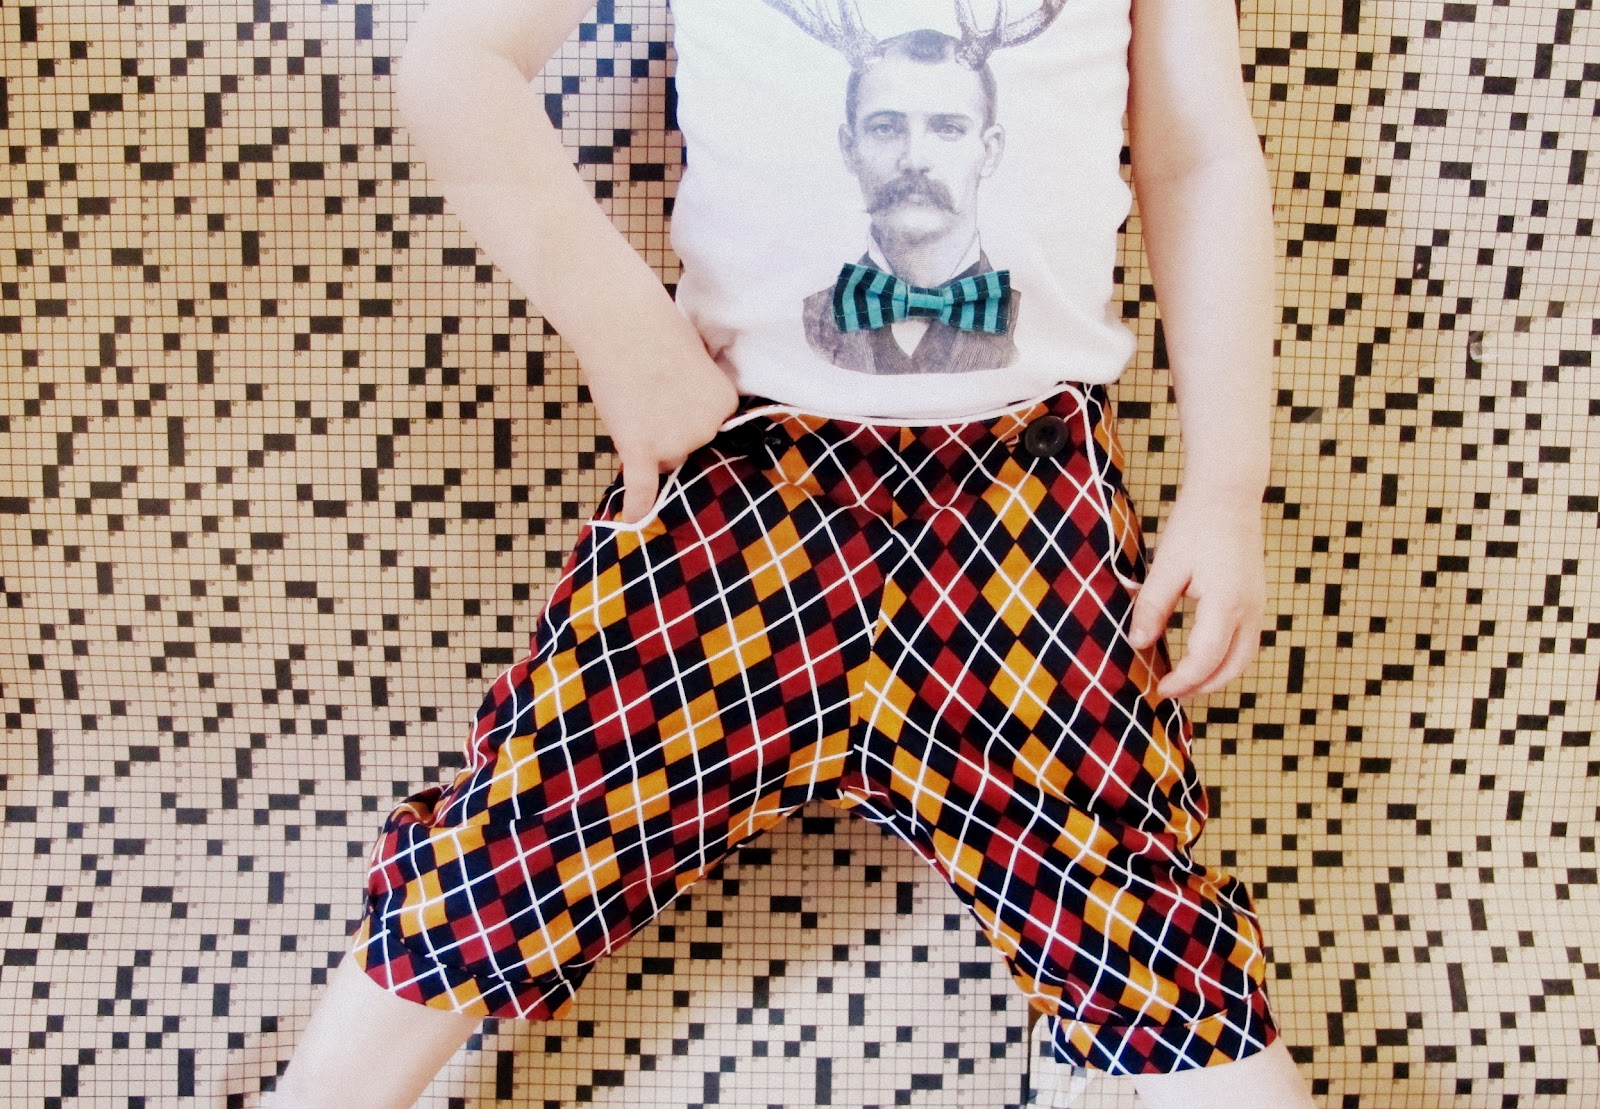
I added my son’s nickname “RJ BOY” to the front of the flap on the side pocket, and you can see the contrasting orange stitching that I used throughout the shorts.
hoser2
I also included standard back pockets on these shorts, as boys need lots of places for their treasures.
hoser9
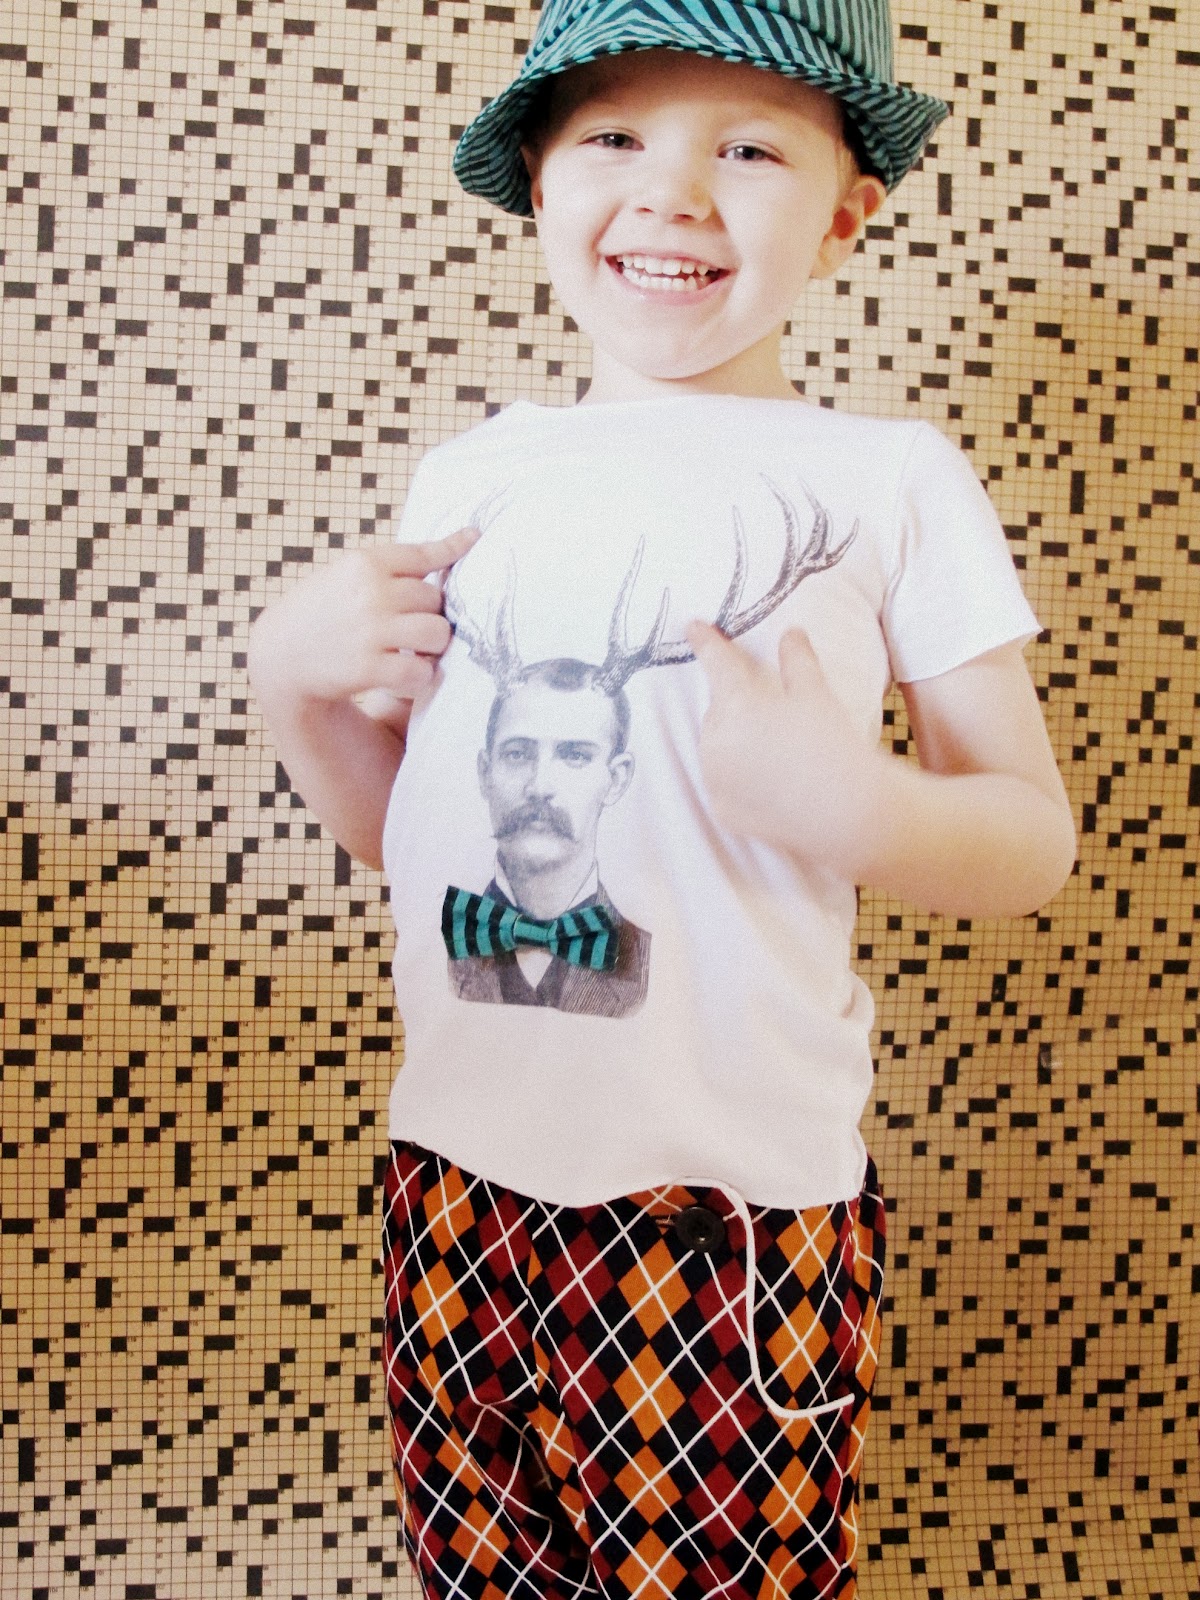
Here are the shorts as is, and below with the orange vinyl belt I made him.
hoser3
We found the shorts were perfect for running and playing, and he liked how easy they were to get on and off himself.
hoser5
CLICK THROUGH FOR THE TUTORIAL:
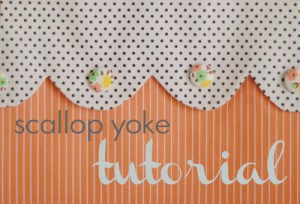
vintage may guest: cirque du bebe

my guest today is sophie from cirque du bebe, and she is quite the impressive lady!  she sews for herself, she sews for her boys (be sure to check out her tutorial for sarouel pants), and her vintage-modern style is so dang cool i can hardly stand it.  i love gals whose styles stretch my comfort zone a bit, and sophie does that in a really inspiring way.  sophie also has an awesome sense of humor that makes her blog a treat to read, and her post today is no exception. 
today she has put together a fantastic vintage-inspired but oh-so-modern outfit for her little guy, complete with tutorial.  take it away, ms. ringleader!
cirque du bebe

When Kristin first announced Vintage May, my thoughts were ‘how has this not been done before? Genius!’ Needless to say I was a bird with a French fry at the thought of putting together an outfit celebrating hand-made, vintage kiddie style. Pretty much all my favorite sewing criteria in one. Here, I’ve taken two modern patterns you know and love, the Oliver and S Sailboat pants and Made By Rae’s Flashback Skinny Tee and busted out a vintage remix and a how-to to go along with it!

~ Le Pants~

They’re charming, swanky and oh so yesteryear, yup, I’m talking boys in bloomers. Once a skeptic but now a convert, they add instant vintage style to any outfit. For this version, I started with everyone’s favorite, the Oliver and S Sailboat shorts. To add that ye olde touch, I found a rather vintage looking (but probably circa last year) thrifted fabric, piped the top edge and added bloomer cuffs to the legs.

~ Le Shirt~

I once had a particular fondness for poaching brand new men’s shirts for their vintage images to re-fashion into boy’s t-shirts, see here and here. I had it totally justified that I was supporting Etsy sellers but it soon dawned that hey, what if I could transfer my own images onto tees? And since then, I’ve been on an endless quest for an easy and washable transfer method that doesn’t involve a screen print, messy solvents or the plastic-y feel of iron-on transfer paper. Last week I discovered the Lesley Riley TAP Artist Transfer Paper. This stuff is worthy of an eternal happy dance. Think super high quality iron-on transfer paper, with a matte finish, washable (apparently not just the once) that works on knits! I bought the ‘gentleman with antlers’ as a digital image from here. If you’d like to find a million more impossibly vintage images search for ‘digital download’ on Etsy and let the fun begin. The t-shirt here is a short sleeved version of Rae’s ‘flashback skinny tee‘ and I decided to leave off the ribbing at the neck and cuffs for an edgy effect. We’re all about the edgy.

~ Le Fedora~

 The best part of this challenge was being able to take ‘vintage children’s outfit’ and take it where you like. I set out to make an outfit that was both modern and comfortable, with a vintage flair. So it needed a fedora hat with this pattern, made from a candy striped vintage men’s shirt. I didn’t read the size guide before buying the pattern and it says the largest size will fit a three year old, not a four year old with a big head. Somehow it works!

~    ~
and now, won’t you please…

~ Click through to Cirque du Bebe for Le Tutorial ~

 Adding instant vintage with a bloomer bottom!

***

see what i mean?  argyle bloomers!  antler-bowtie man!  sophie is simply the coolest.  head on over to CINO to check out a lovely lace dress tutorial by  jessie of i’m thinking!

cino vintage

vintage may guest: hart & sew

my guest today is stacy from hart & sew. i “met” her when we guest posted for sparkle power together and i’ve been a loyal follower ever since. stacy is a true lover of vintage style, in her home, in how she dresses herself, and in how she dresses her two adorable girlies (here and here). she has an etsy shop selling the cutest vintage kids’ clothes (O’s easter shirt came from there!), and has fun creative ideas like turning your child’s drawing into a stuffie, which i had to try as soon as i possibly could (resulting in this)!

today stacy shares a tutorial to add sweet vintage-inspired detail to an existing pattern. take it away, stacy!

hartandsew

Hello! Today I am going to show you how to alter a dress pattern to add a sweet vintage-inspired scalloped yoke. First, of course, you will need to choose a pattern – I chose a simple vintage sleeveless jumper for mine, in a size 4T.

Find the dress front pattern piece. We are going to use it to make our yoke pattern pieces. Using paper you can trace with (I used freezer paper), trace the outline of the top shoulder to about 2″ past the sleeve opening, then draw a straight line across the bottom. Trace all of the seam allowances and add other important information such as the center fold as well.

Cut out your new yoke pattern piece and it should look similar to this:

Next, we are going to make a yoke facing pattern piece. Lay your tracing paper on top of the yoke pattern piece you just made, and trace around the bottom going 4″ up the sides. Draw a straight line across the top. Remember to transfer over any important information on this piece as well.

Now you should have yoke and yoke facing pattern pieces that look similar to this:

Now, we will add the scallops to the yoke facing piece. Starting on the side with the center fold, measure 1 1/2″ up from the bottom and draw a large dot. Then measure 3″ over and add another dot, and again a dot 3″ over one more time (these measurements may be adjusted depending on how many/what size you want your scallops to be).

Next, draw the scallops connecting them at the top with the dots and making sure to leave yourself a seam allowance at the bottom (in other words, do not go all the way down to the bottom edge of the pattern). Now the yoke facing piece is complete.

The last pattern piece we need to make is the bottom part of the dress front piece, or the skirt. To do this place the yoke facing piece on top of the original dress front pattern piece. Using the tracing paper trace around the top of the yoke facing piece, then trace around the rest of the pattern down to the hemline without making any additional changes. Essentially, you just want to chop off the top.

Congratulations, you now have three separate pattern pieces where you originally had one! A yoke piece, a yoke facing piece, and a (decapitated) dress front piece.

Cut out your fabric pieces now. On the yoke facing piece you may want to add thread markers on the large dots as I did in red thread, but this is optional. Open it up, and using your choice of fabric marker draw the scallops on the WRONG side of the fabric all the way across.

Then pin the yoke facing piece to the yoke piece RIGHT sides together.

Sew along the scallop markings.

Trim the seam and clip curves.

Then turn the yoke facing right-side out. A little trick to get smooth curves is to poke a crochet hook or something similar in the scallops and push out along the edges. Iron flat.

Next, open up the yoke piece and pin the yoke facing to the dress front piece RIGHT sides together.

Sew along the top edge.

And, you’re done! Okay, maybe not entirely done, but your new dress front piece with a darling scalloped yoke is done. Continue to sew your dress per your patterns instructions.

And, here is my finished dress! I embellished mine with fabric buttons on the scallops as well as two pleated pockets.

And, I think she likes it!

BONUS!!! Use these same instructions to make a jagged yoke dress!

Using the same measurements (1.5″ up, 3″ over), simply draw a jagged line on the yoke facing piece instead of scallops:

I hope you enjoyed this tutorial, thank you for having me Kristin!

***

argh, SO cute! thanks, stacy! when i saw this tutorial i immediately thought a good “new pattern” to try it on might be the tea party sundress (available as digital pattern).

today, jess has a pretty awesome blogger with a lovely adult project! find out who it is right here!

cino vintage

vintage may inspiration: strong boy

vintage may-2

i had decided that for my “inspiration leading up to vintage may” projects this week, i wanted to make something for my daughter and something for my son. but the idea that i had for him, which nestled itself in my brain and would not budge, was an old timey striped swimsuit/strongman type outfit (like this). it seemed so impractical, but was so funny to me that i just couldn’t shake the thought! so i made it.

IMG_1033

originally i thought it should be one piece with sleeves, which is completely out of the box of what i’d have him wear, but after consulting various sewing blog confidants (especially this jess), i decided to make it a two-piecer, remixing rae’s flashback skinny tee into a tank top and making my own shorts pattern. the band at the bottom creates the illusion that it’s a one-piece romper, but it’s not!

IMG_1046

the outfit is totally ridiculous, and it cracks me up with his little belly. i think he’ll get a lot of use out of the tank this summer, and i’m sure he can wear the shorts as pajamas at very least. and by the way – 17 month olds are terrible models! he wanted the “boos” off of the glitter wand i had taped them to and would do no “lift the barbell above the head” type poses under any circumstances. he started running off almost as soon as i could set him in place. it was one of those situations where i took a bunch of photos and prayed a few turned out. ha!

Untitled-4

anyway, here’s a quickie tutorial.

***

STRONG BOY TANK TOP

to turn the flashback skinny tee into a tank, narrow the shoulder seams 3/4″ (on the 12-18 month size). if you’re adding a contrast band as a hem, shorten the length 1 1/2″. i should have scooped out the armhole a little more, it cuts into him a bit. next time.

Untitled-5

sew the pattern per rae’s instructions, attaching the neck binding as directed (the fold-in-half-and-sew-to-the-right-side method). use that same method to attach a hem band (total width of your tee minus 1″, 4″ height, and then fold it in half to make a 2″ band), and arm hole bindings (cut 2″ wide, and about 1″ less than the armhole width).

IMG_0949

i used a serger for the whole thing and it went super fast. done. i’ll probably tweak the armholes a bit and make more of these for summertime. oh and the binding is actually bright red, but i couldn’t help but do some vintage photo processing on these. when else but during vintage may, eh?

IMG_1017

***

STRONG BOY SHORTS

make a pattern using pajama or knit pants that fit your kid well. i wanted mine slim fitting but a little wider than the PJs he has. add plenty of room at the top waistband to cover the kid’s diaper if he/she wears one – the shorts look silly if you just hold them up, but it’s necessary.

IMG_0940

create a front and a back. cut two of each.

Untitled-6

sew the side seams of each leg, front to its corresponding back, right sides together. then sew the crotch seam. turn one leg right side out, place it inside the other leg, and sew around the inseam. serge the top, fold down to create your elastic casing, and sew (leaving an opening for the elastic). insert elastic to fit. hem the shorts (highly recommend using a walking foot and a stretch/zigzag stitch if you’re using jersey knit).

IMG_0991

just a few more silly photos…

IMG_0998

IMG_0968

IMG_0957

he read his book and now he’s tired.

IMG_0967

if you make a strong boy (kid) outfit using this mini-tutorial, please add it to the vintage may flickr group! i’ve got a round up coming soon, so chop chop! 🙂

vintage may

today jess over at CINO is talking about vintage notions! check out her post here.

vintage may inspiration: little skirts with vintage flair

vintage may-1

i’ve long been intrigued by vintage trims like lace, doilies, and rickrack.  what would i use them for?  are they too granny?  i’ve kept my eyes open to see how people use these sweet little trims in modern design, and i finally i know – you use them to make little skirts even cuter!

little skirts with vintage flair tutorial

while i love vintage style and drink it in online, my own home, clothing choices, and what i sew for my kids tends to be more vintage-inspired.  i love to follow purely vintage blogs for the eye candy and thrifty inspiration (smile and wave, cakies, bleubird, and a beautiful mess are some of my faves).  months ago, i spotted an adorable doily skirt on cakies, a rickrack pocket skirt on bluebird, and i finally got the chance to try making them both!  i’m super in love with the results and i thought i’d share a couple mini tutorials today.

little skirts with vintage flair tutorial

*** RICKRACK POCKET SKIRT

make a simple selvedge-to-selvedge skirt (follow the oliver + s free lazy days skirt pattern, eliminating the ribbon hem and adding an extra .5″ to the length allow yourself to make a double fold 1/4″ hem).


little skirts with vintage flair tutorial

my skirt fabric is kona mustard and the pocket is a vintage sheet.

IMG_5572

make your pocket.  cut two 5″ or 6″ squares out of your pocket material.  fold in half and round all four bottom corners.  sew right sides together, leaving a space to turn on the side.  turn right side out, press.  find the center of your skirt by folding it in half with the back seam, and also find the side the same way.  center the pocket between the front and side.

IMG_5632

slide rickrack under the pocket, and pin well.  ease it around curves and try to keep the part poking out even.  topstitch close to the edge of the sides and bottom of the pocket, which will close the opening in the pocket and secure the rickrack.  add elastic to the waistband, hem the skirt, and you’re done!

little skirts with vintage flair tutorial

***

DOILY SKIRT

rubyellen’s doily skirt is hand-stitched, but i wanted to try machine-stitching it because it’s quicker and more secure.  first make a skirt with a contrasting waistband (follow dana’s market skirt tutorial for directions but you won’t add the bottom band, so be sure to give your skirt enough length to work without it).  wait to add the waistband elastic.  i used a lightweight chambray and the waistband is a fat quarter from my stash.  my chambray is two pieces, each 12.5″ long by 35″ wide for my petite four year old.  i wanted it FULL.  for best results, be sure your skirt material has some drape if you want to make it as full as this.

little skirts with vintage flair tutorial

the doily looks like it’s from an estate sale, but it’s really from joann (probably would’ve been cheaper to thrift it, but i liked the look of this one, it’s cotton and sturdy).  wash, dry, and iron it flat.  i used basting spray for quilting to adhere the doily to the skirt centered between the front and side seam, and pinned around the edges as well.

IMG_5629

take a close look at your doily and try to identify the “rings” that seem thicker and continuous so you can easily follow them around the doily.

doily skirt

starting in the very center, sew around a few “rings” using coordinating thread, backstitching at the beginning and end.  then slowly sew around the perimeter of the doily, trying not to stretch it as you sew – just hold it down flat to the skirt.  i sewed it on with a normal foot and my machine had no trouble – my stitches completely disappeared into the doily.  can’t even see them from the front.


doily skirt

add elastic and you’re done!  now your little gal can pick some flowers and relax in the shade with her best friend!

little skirts with vintage flair tutorial

if you make a rickrack pocket or doily skirt using this tutorial, please add them to the vintage may flickr group!

vintage may
today jess over at CINO has posted a tutorial for a beeeeeautiful eyelet overlay dress!  you’ve gotta go check it out.