my guest today is stacy from hart & sew. i “met” her when we guest posted for sparkle power together and i’ve been a loyal follower ever since. stacy is a true lover of vintage style, in her home, in how she dresses herself, and in how she dresses her two adorable girlies (here and here). she has an etsy shop selling the cutest vintage kids’ clothes (O’s easter shirt came from there!), and has fun creative ideas like turning your child’s drawing into a stuffie, which i had to try as soon as i possibly could (resulting in this)!
today stacy shares a tutorial to add sweet vintage-inspired detail to an existing pattern. take it away, stacy!

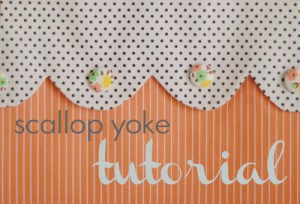

Hello! Today I am going to show you how to alter a dress pattern to add a sweet vintage-inspired scalloped yoke. First, of course, you will need to choose a pattern – I chose a simple vintage sleeveless jumper for mine, in a size 4T.
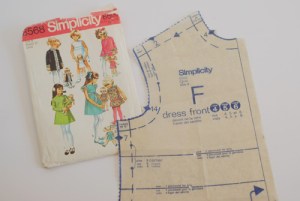
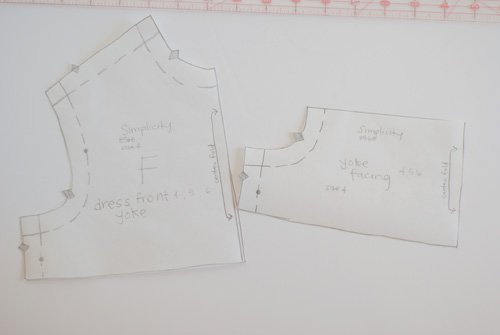
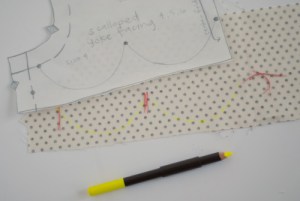
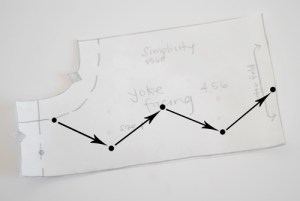
Find the dress front pattern piece. We are going to use it to make our yoke pattern pieces. Using paper you can trace with (I used freezer paper), trace the outline of the top shoulder to about 2″ past the sleeve opening, then draw a straight line across the bottom. Trace all of the seam allowances and add other important information such as the center fold as well.

Cut out your new yoke pattern piece and it should look similar to this:
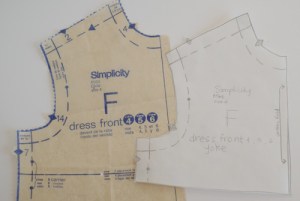
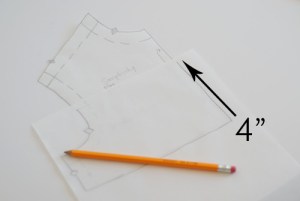
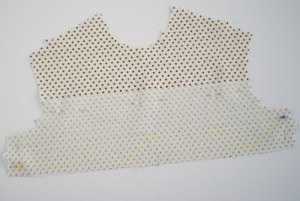
Next, we are going to make a yoke facing pattern piece. Lay your tracing paper on top of the yoke pattern piece you just made, and trace around the bottom going 4″ up the sides. Draw a straight line across the top. Remember to transfer over any important information on this piece as well.
Now you should have yoke and yoke facing pattern pieces that look similar to this:
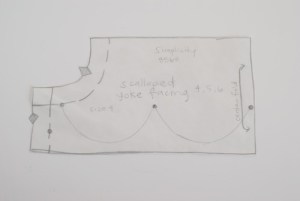
Now, we will add the scallops to the yoke facing piece. Starting on the side with the center fold, measure 1 1/2″ up from the bottom and draw a large dot. Then measure 3″ over and add another dot, and again a dot 3″ over one more time (these measurements may be adjusted depending on how many/what size you want your scallops to be).

Next, draw the scallops connecting them at the top with the dots and making sure to leave yourself a seam allowance at the bottom (in other words, do not go all the way down to the bottom edge of the pattern). Now the yoke facing piece is complete.
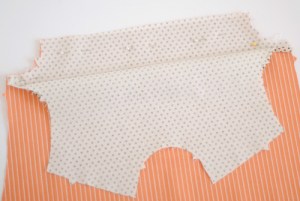
The last pattern piece we need to make is the bottom part of the dress front piece, or the skirt. To do this place the yoke facing piece on top of the original dress front pattern piece. Using the tracing paper trace around the top of the yoke facing piece, then trace around the rest of the pattern down to the hemline without making any additional changes. Essentially, you just want to chop off the top.
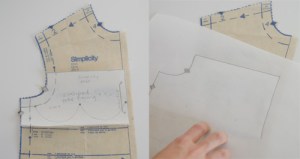
Congratulations, you now have three separate pattern pieces where you originally had one! A yoke piece, a yoke facing piece, and a (decapitated) dress front piece.
Cut out your fabric pieces now. On the yoke facing piece you may want to add thread markers on the large dots as I did in red thread, but this is optional. Open it up, and using your choice of fabric marker draw the scallops on the WRONG side of the fabric all the way across.
Then pin the yoke facing piece to the yoke piece RIGHT sides together.
Sew along the scallop markings.

Trim the seam and clip curves.

Then turn the yoke facing right-side out. A little trick to get smooth curves is to poke a crochet hook or something similar in the scallops and push out along the edges. Iron flat.

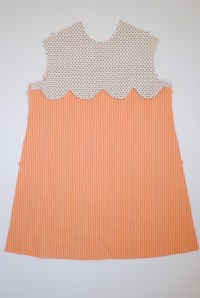
Next, open up the yoke piece and pin the yoke facing to the dress front piece RIGHT sides together.
Sew along the top edge.

And, you’re done! Okay, maybe not entirely done, but your new dress front piece with a darling scalloped yoke is done. Continue to sew your dress per your patterns instructions.
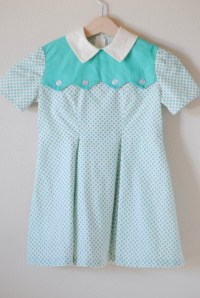
And, here is my finished dress! I embellished mine with fabric buttons on the scallops as well as two pleated pockets.

And, I think she likes it!

BONUS!!! Use these same instructions to make a jagged yoke dress!
Using the same measurements (1.5″ up, 3″ over), simply draw a jagged line on the yoke facing piece instead of scallops:
I hope you enjoyed this tutorial, thank you for having me Kristin!
***
argh, SO cute! thanks, stacy! when i saw this tutorial i immediately thought a good “new pattern” to try it on might be the tea party sundress (available as digital pattern).
today, jess has a pretty awesome blogger with a lovely adult project! find out who it is right here!


